Smart Home Gadgets for Low Cost Automation Systems
Smart home automation doesn’t have to break the bank. Exploring low cost smart home automation reveals important insights. With the right devices, you can automate lighting, climate, security, and daily routines for under $200—sometimes much less. Affordable smart home gadgets now offer reliable performance, easy setup, and compatibility with major platforms like Alexa, Google Assistant, and Apple HomeKit. Whether you’re a renter or a homeowner, these budget-friendly tools make automation accessible without sacrificing functionality.
Why Choose Low-Cost Smart Home Automation?
Many people assume smart homes require expensive hubs, professional installation, or full-home rewiring. That’s no longer true. Modern low-cost automation systems use wireless protocols like Wi-Fi, Zigbee, and Bluetooth to connect devices without complex infrastructure.
Affordable options reduce entry barriers, letting you test automation on a small scale. Start with one or two gadgets, see how they fit your routine, and expand over time. This approach minimizes risk and helps you avoid overspending on features you don’t use.
Low-cost doesn’t mean low quality. Many budget devices offer core automation features—scheduling, remote control, voice commands—that deliver real convenience. The key is choosing products with strong reviews, reliable connectivity, and long-term software support.
Top Budget-Friendly Smart Home Gadgets
Below are proven, affordable devices that deliver automation value without high costs. Each supports integration with popular voice assistants and mobile apps, ensuring flexibility and ease of use.
Smart Plugs: The Easiest Entry Point
Smart plugs are the most accessible way to automate any standard outlet. Plug in a lamp, fan, or coffee maker, and control it remotely via app or voice.
Popular models like the Kasa Smart Plug HS103 ($10–$15) work over Wi-Fi and require no hub. Schedule lights to turn on at sunset or set a coffee maker to brew at 7 a.m. They’re ideal for renters since they don’t require permanent changes.
Look for plugs with energy monitoring and scheduling. Avoid ultra-cheap no-name brands—they often lack security updates and may disconnect frequently.
Smart Light Bulbs: Automate Lighting Affordably
Smart bulbs let you automate lighting without rewiring. Brands like Philips Hue White Ambiance offer quality, but newer budget options like Meross Smart Bulbs ($8–$12 each) provide similar features at half the price.
Choose white ambiance bulbs over RGB color-changing ones if you only need dimming and scheduling. They’re cheaper and sufficient for most automation needs. Pair them with motion sensors or routines to turn lights on when you enter a room.
Note: Some bulbs require a hub (like Zigbee models), which adds cost. Wi-Fi bulbs are plug-and-play but may slow your network if you use many at once.
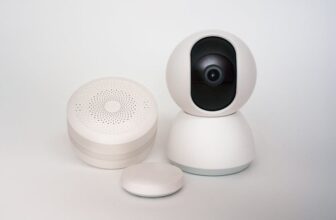
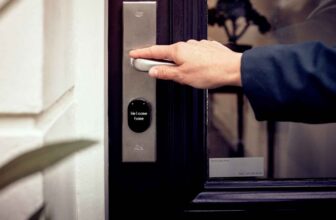
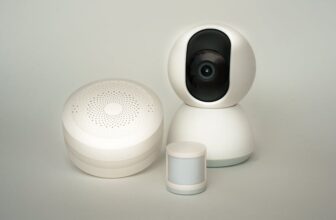
Motion and Door Sensors: Trigger Automations
Sensors are the backbone of responsive automation. A Aqara Motion Sensor ($10) or Eve Door & Window Sensor ($20) can trigger lights, alerts, or routines based on movement or door status.
Place a motion sensor in a hallway to turn on lights at night. Use a door sensor to get a notification when your front door opens unexpectedly. These devices typically run on coin-cell batteries and last 1–2 years.
Ensure compatibility with your ecosystem. Aqara sensors work best with Apple HomeKit or Mi Home, while Eve devices integrate seamlessly with HomeKit. Avoid sensors that only work with proprietary apps lacking automation features.
Smart Thermostats: Save on Energy Bills
A smart thermostat can pay for itself in energy savings. The Google Nest Thermostat ($130) and ecobee SmartThermostat Lite ($120) offer scheduling, remote control, and learning features.
Both work with existing HVAC systems and support voice control. The ecobee includes a remote sensor for better temperature readings in larger rooms. The Nest has a simpler design and integrates tightly with Google services.
Warning: Check compatibility with your heating system before buying. Electric baseboard heaters and some older systems may not support smart thermostats without additional hardware.
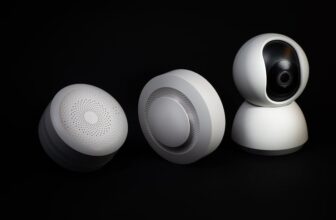
Smart Speakers and Displays: Central Control Hubs
A smart speaker acts as a voice control center. The Amazon Echo Dot (5th gen) ($50) and Google Nest Mini ($49) offer excellent value and support thousands of smart devices.
Use voice commands to turn off lights, check the weather, or start routines. The Echo Dot includes a Zigbee hub, allowing direct control of compatible sensors and lights without extra hardware.
Smart displays like the Echo Show 5 ($85) add a screen for video calls, camera feeds, and visual controls. Useful if you plan to add security cameras later.
Building a Cohesive Low-Cost Automation System
A successful automation setup relies on compatibility and simplicity. Mixing too many ecosystems leads to app clutter and unreliable performance.
Choose One Ecosystem
Pick a primary platform: Amazon Alexa, Google Assistant, or Apple HomeKit. Stick to devices that work natively with your chosen system.
For example, if you use an iPhone, HomeKit offers strong privacy and seamless integration. Android users may prefer Google Assistant for broader device support. Alexa works well across both platforms and supports the most third-party devices.
Avoid devices that require their own apps with limited automation. Look for “Works with Alexa” or “Google Certified” labels to ensure compatibility.
Start Small and Scale
Begin with one room or one function—like automating bedroom lighting. Use a smart plug for your lamp and a motion sensor to turn it on at night.
Once that works reliably, add a smart bulb in the hallway or a door sensor for the front door. Gradual expansion helps you learn what works and avoid overwhelming complexity.
Document your setup. Note which devices are connected, how routines are configured, and any issues that arise. This makes troubleshooting easier later.
Use Automation Routines
Routines turn multiple actions into one command. Set up a “Good Morning” routine that turns on lights, starts the coffee maker, and reads the weather.
In the Google Home app, create routines triggered by voice, time, or sensor input. Alexa allows similar automation through “Alexa Routines.” HomeKit uses “Automations” based on time, location, or sensor events.
Example: When motion is detected after 10 p.m., turn on the hallway light at 20% brightness. This saves energy while providing safety.
Common Pitfalls and How to Avoid Them
Even low-cost systems can fail if not set up properly. Avoid these common mistakes to ensure reliable performance.
Overloading Your Wi-Fi Network
Too many Wi-Fi devices can slow your network or cause dropouts. Smart bulbs, plugs, and cameras all use bandwidth.
Solution: Use a dual-band router and connect smart devices to the 2.4 GHz band. Exploring low cost smart home automation reveals important insights. Limit the number of high-bandwidth devices like cameras. Consider a mesh network if you have a large home.
Alternatively, choose Zigbee or Z-Wave devices, which use a separate low-power network and reduce Wi-Fi congestion.
Ignoring Privacy and Security
Smart devices collect data. Cheap or unknown brands may lack encryption or regular firmware updates.
Stick to reputable brands with clear privacy policies. Change default passwords and enable two-factor authentication where available. Regularly check for firmware updates in device apps.
Avoid devices that require constant internet access for basic functions. Local control (like HomeKit or local Alexa routines) is more secure and faster.
Buying Incompatible Devices
Not all “smart” devices work together. A Zigbee sensor won’t connect to a Wi-Fi-only hub.
Check compatibility before buying. Use tools like the Works With checker on Amazon or manufacturer websites. Read user reviews for real-world integration experiences.
When in doubt, choose devices from the same brand or those certified for your ecosystem.
Cost Comparison: DIY vs. Professional Systems
Professional smart home installations can cost thousands. A full system from brands like Control4 or Crestron includes custom programming, wiring, and equipment.
DIY low-cost automation achieves 80% of the functionality for 10% of the price. You can automate lighting, climate, security, and entertainment without professional help.
The trade-off is less customization and no centralized touch panel. But for most users, app and voice control are sufficient. You can always upgrade later.
Example: A $150 DIY setup (smart plug, bulb, sensor, Echo Dot) can automate a bedroom. A professional system for the same room might cost $1,500.
Future-Proofing Your Budget Automation
Technology evolves quickly. Choose devices that will remain useful as your needs grow.
Prioritize Open Standards
Devices using Zigbee, Z-Wave, or Matter are more likely to work with future systems. Matter, a new smart home standard, ensures cross-platform compatibility.
Look for “Matter-over-Thread” support in new devices. This reduces reliance on specific hubs and improves long-term usability.
Even if your current setup doesn’t support Matter, buying compatible devices now prepares you for future upgrades.
Avoid Proprietary Ecosystems
Some brands lock you into their app and cloud. If the company shuts down, your devices may stop working.
Choose devices with local control options or open APIs. This ensures you can still use them even if cloud services change.
For example, Home Assistant is an open-source platform that integrates many budget devices. It runs locally and offers advanced automation without monthly fees.
Plan for Expansion
Buy a smart speaker with a built-in hub (like the Echo Dot) to support future Zigbee devices. This avoids buying a separate hub later.
Keep your network infrastructure in mind. A strong Wi-Fi setup today supports more devices tomorrow. Upgrade your router if you plan to add cameras or sensors throughout the house.
Real-World Example: A $120 Smart Bedroom Setup
Here’s how to automate a bedroom for under $120 using proven, reliable gadgets.
- Kasa Smart Plug HS103 – $12 (controls bedside lamp)
- Meross Smart Bulb (White Ambiance) – $10 (ceiling light automation)
- Aqara Motion Sensor – $10 (triggers lights at night)
- Amazon Echo Dot (5th gen) – $50 (voice control and hub)
- Smart Plug for Fan – $12 (optional, for summer cooling)
Total: $94–$106
Automation routine: When motion is detected between 10 p.m. and 6 a.m., turn on the Meross bulb at 15% brightness. At 7 a.m., turn on the lamp via the smart plug. Use voice commands to turn everything off at night.
This setup improves convenience, saves energy, and enhances security—all without permanent changes.
Final Tips for Success
Start with one device and master it before adding more. Read setup guides and watch tutorial videos. Join online communities like Reddit’s r/homeautomation for troubleshooting help.
Keep receipts and check return policies. Some devices may not work as expected in your environment.
Automate for real needs, not just novelty. Focus on tasks that save time, improve safety, or reduce energy use.
Finally, be patient. Automation improves with time and tweaking. Small changes add up to a smarter, more efficient home.
FAQ
Q: Can I build a smart home system without a hub?
A: Yes. Many budget devices like Wi-Fi smart plugs and bulbs work directly with your router. Choose Wi-Fi or Matter-enabled devices to avoid hubs. Only Zigbee or Z-Wave devices typically require one.
Q: Are cheap smart home gadgets safe to use?
A: Reputable budget brands like Kasa, Meross, and Aqara are generally safe. Avoid unknown brands with no reviews or security updates. Always change default passwords and keep firmware updated.
Q: Will low-cost automation work in a rental apartment?
A: Absolutely. Smart plugs, bulbs, and sensors require no wiring or permanent changes. They’re ideal for renters and can be moved when you relocate.